Index of the post
- What you’ll build
- Why use the official Connector plugin
- The 6-month free program for feedback
- Step 1: Install the Connector plugin
- Step 2: Create your first popup
- Step 3: Choose smart triggers and targeting
- Step 4: Publish without touching code
- Step 5: Measure, learn, and iterate
- Design and accessibility checklist
- Performance, SEO, and compatibility
- Troubleshooting quick wins
- Put it all together
Published at: 11 Sep 2025
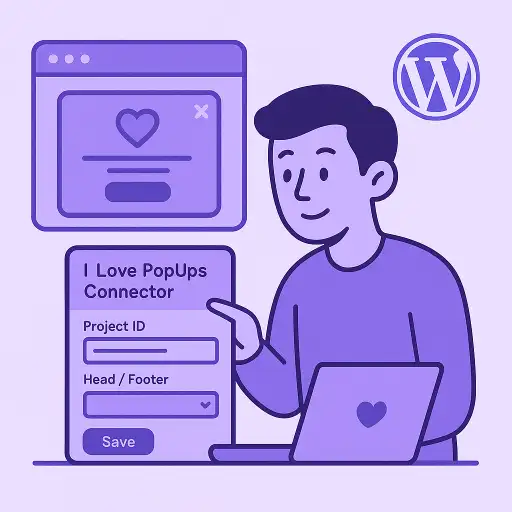
If you run WordPress, you can add high-converting popups in minutes with I Love PopUps. This guide walks you through the full flow, from installing the official Connector plugin to publishing, targeting, testing, and improving results. We will also show you how to claim 6 months free in exchange for real product feedback, so you can experiment at no cost while helping shape the roadmap.
To keep everything fast, accessible, and respectful of your visitors, we will reference field-tested guidelines like these best practices for popups and timing advice on when to show a popup. If you prefer a structured path with short lessons, bookmark the I Love PopUps Academy and hands-on topics such as how to create popups without coding or how to analyze your popup data.
What you’ll build
You will create a reusable popup that:
-
Loads on any WordPress theme without touching theme files.
-
Uses triggers like time on page, scroll depth, exit intent on desktop, or page targeting by category, tag, and custom post type.
-
Captures leads with a minimal form and routes data to your stack.
-
Respects accessibility and performance budgets.
-
Ships with a simple workflow to run A/B tests and learn faster.
Why use the official Connector plugin
Security and reliability matter. The official I Love PopUps Connector is available on WordPress.org and maintained to follow directory standards. Install it directly from your dashboard or from the public listing here: I Love PopUps Connector. The plugin injects the loader snippet for you, so you can manage all popups in the I Love PopUps dashboard without editing templates or headers. If your stack requires a manual installation or a fallback snippet, this short primer on how to install a script on your website covers safe placement.
The 6-month free program for feedback
We are inviting WordPress site owners to try I Love PopUps for 6 months free in exchange for honest feedback about the product. The idea is simple. You run real campaigns, share actionable notes about what helped and what you wish worked better, and we use that input to improve the experience. There is no pricing mentioned here and no credit card details in this tutorial. If you want in, follow the steps below and then reply to the onboarding email with “feedback program” so the team can tag your account.
Step 1: Install the Connector plugin
-
In your WordPress dashboard, go to Plugins, then Add New.
-
Search for “I Love PopUps Connector”.
-
Install and Activate.
-
Open the plugin settings and paste your site key from I Love PopUps. If you are just getting started, sign up and follow the quick start inside the app. For extra help, the Academy’s lesson on how to get the most out of I Love PopUps shows a smooth path from zero to first results.
Once connected, the plugin loads your popups automatically across your site. You do not need to place shortcodes or edit templates unless you want very granular control.
Step 2: Create your first popup
Inside I Love PopUps, create a new popup and pick a clean layout. If you do not want to design from scratch, start with a simple email capture. The lessons on how to create popups without coding show simple patterns that fit most brands.
Content tips that tend to win:
-
Lead with a specific benefit and keep the form short.
-
Offer something concrete like a checklist, a first-order perk, or member-only tips.
-
Use a strong call to action and make dismissal effortless.
For high-level UX patterns that protect user experience, skim these best practices for popups.
Step 3: Choose smart triggers and targeting
WordPress gives you rich context for targeting. Combine it with popup triggers to maximize relevance.
-
Time or scroll: delay the first request until the reader is engaged. For context-driven advice, see how to use popups on your website.
-
Exit intent on desktop: show when the cursor heads to the top bar. Pair it with a gentle, value-first headline.
-
Per category or tag: show a category-specific offer on related posts.
-
Custom post types: surface different prompts on product pages vs. blog posts.
-
WooCommerce baskets: nudge with shipping thresholds or perks at cart or checkout. For ecommerce use cases, study the strategy behind recovering abandoned carts using popups.
-
Frequency capping: avoid repetition. Set one-per-session for informational popups and longer windows for promos.
Timing is contextual. This overview of when to show a popup explains how entry, scroll, and exit triggers fit different page intents.
Step 4: Publish without touching code
With the Connector active, publishing is as simple as changing the popup status to “Live” in I Love PopUps. The plugin handles script injection globally and keeps your configuration in sync. If you ever need a manual embed for a headless or decoupled area, keep the proven approach from how to install a script on your website in your notes.

Step 5: Measure, learn, and iterate
Popups are an optimization game. Use the built-in analytics to track impressions, CTR, and submissions, then interpret patterns with how to analyze your popup data. When you are ready, run structured experiments as taught in how to run A/B tests on your popups. A simple cadence works best:
-
Test one variable at a time.
-
Run long enough to reach a trustworthy sample.
-
Keep the winner and move on.
If you manage several properties or clients, the Academy’s guide on managing popup campaigns for multiple clients shares a setup that stays tidy at scale.
Design and accessibility checklist
-
Give the close button a visible style and a comfortable hit area.
-
Respect keyboard navigation and ensure focus returns to the trigger.
-
Keep copy succinct and scannable on mobile.
-
Use fewer fields and show social proof only if it helps clarity.
-
Prefer subtle motion and respect reduced-motion preferences.
If you need a refresher on ethical, user-first patterns, revisit the best practices for popups.
Performance, SEO, and compatibility
-
Caching and CDNs: the Connector loads the script client-side, so you can keep full-page caching enabled.
-
Lazy loading: load assets only when needed.
-
Core Web Vitals: keep your popup light and avoid blocking the main thread.
-
Theme and builder compatibility: because rendering happens client-side, you can use block themes, classic themes, or page builders without refactoring.
For long-term consistency, study the mindset in how to use popups on your website, which balances conversions with user flow.
Troubleshooting quick wins
-
Popup not showing on a specific template: confirm the Connector is active on that site and the popup’s targeting includes the current path.
-
Staging vs. production: verify your site key matches the domain.
-
Double display: reduce overlapping campaigns and enable frequency caps.
-
Analytics not moving: the fastest lever is a clearer headline and simpler form. Learn from best practices to create popups that convert.
Put it all together
Install the official I Love PopUps Connector, create a focused popup in the app, choose timing that matches your content, and publish. Then commit to a weekly rhythm of small tests. If you want more guided learning as you go, keep the Academy handy and revisit deep dives like how to get the most out of I Love PopUps.
Remember the 6-month free feedback program. It is a safe way to validate your ideas, gather learnings, and help improve a tool that is built around respectful popups and measurable outcomes.


